Google Calendar is one of the most popular calendar tools on the web. Google first released Google Calendar to the general public in 2009, and the app has been increasing in popularity ever since its debut. Displaying your team’s Google Calendar on a digital sign in your office can help ensure that everyone stays informed on upcoming events and commitments. It can help keep people’s schedules in sync and minimize meeting absences. In this guide, we walk you through how to show a Google Calendar on a digital sign.
How to display a Google Calendar on a digital sign
The first step is to go to your Google Calendar and log in.
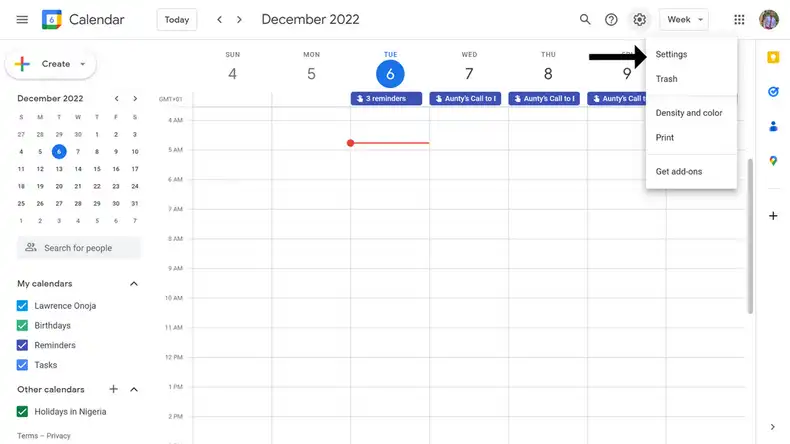
Next, click the gear icon on the top right of your screen. Then, click the Settings tab from the dropdown menu.
In the left-hand side of the screen under the Settings for my calendars section, click on the particular calendar that you would like to share.
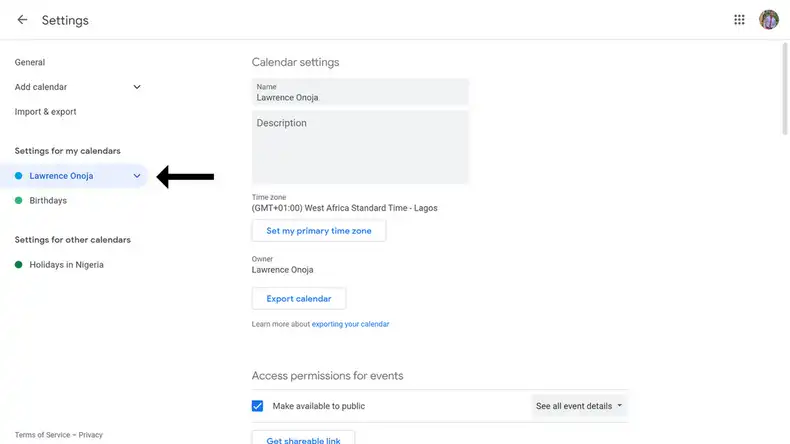
Next, scroll down to the Access permissions for events section in the middle of the page. Check the Make available to public checkbox. This step ensure that your digital sign can access your Google Calendar data.
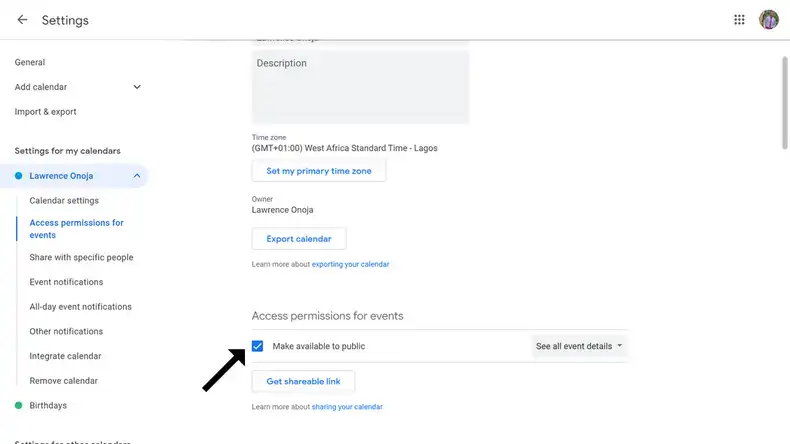
Note that you do not need to share every detail of your personal Google Calendar on your digital sign. You can have your personal Google Calendar show that you are “busy” during meeting times without showing meeting details. To keep meeting details private, select the See only free/busy(hide details) option in the dropdown next to the Make available to public checkbox. If you wish to show all the details of each meeting, select the See all event details option instead.
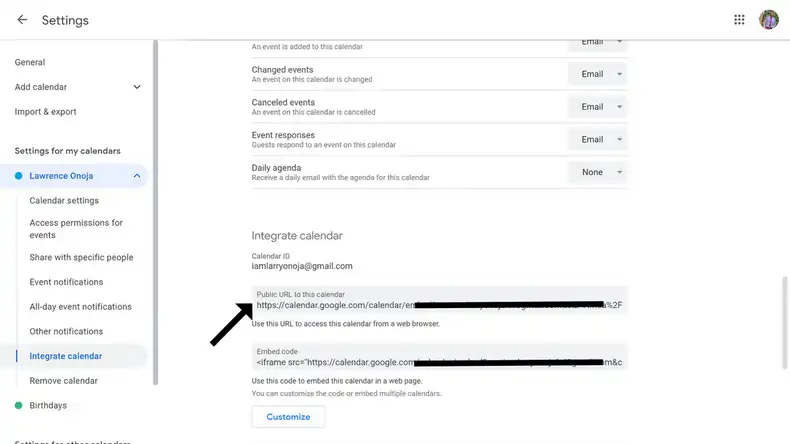
Next, scroll further down the page to the Integrate calendar section. You will see a URL under the Public URL to this calendar subsection. Copy that public URL to your clipboard.
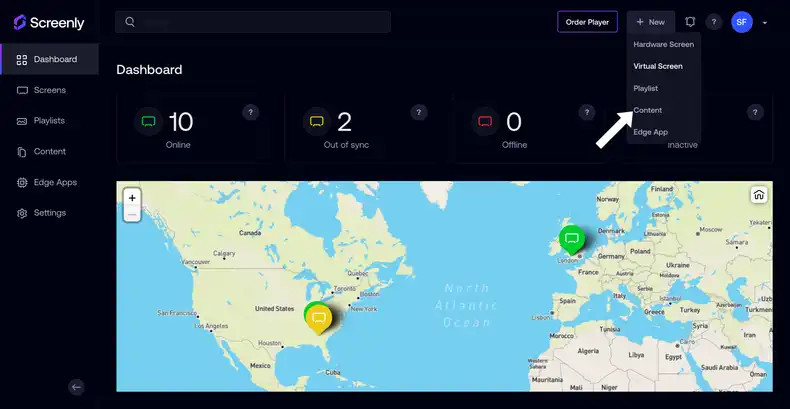
The next step is to share that public URL within the Screenly web interface. To do so, log in to your Screenly account, and click on the Content tab on the left-hand menu. In the new screen that loads, click on the “+ New Content” button on the top right.
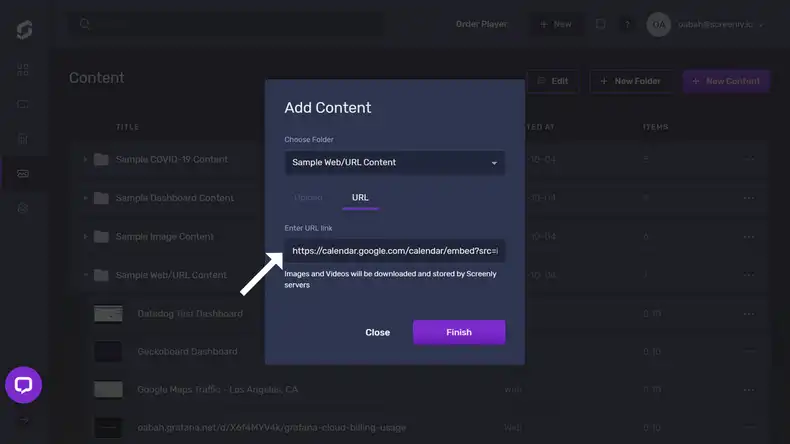
In the popup modal that loads, click the URL tab, and paste the public link for your Google Calendar. Then click Finish on the bottom right. In the new page that loads, you can create a custom title for your Google Calendar in the Title section. Be sure to click Save on the bottom right of the screen after any changes.
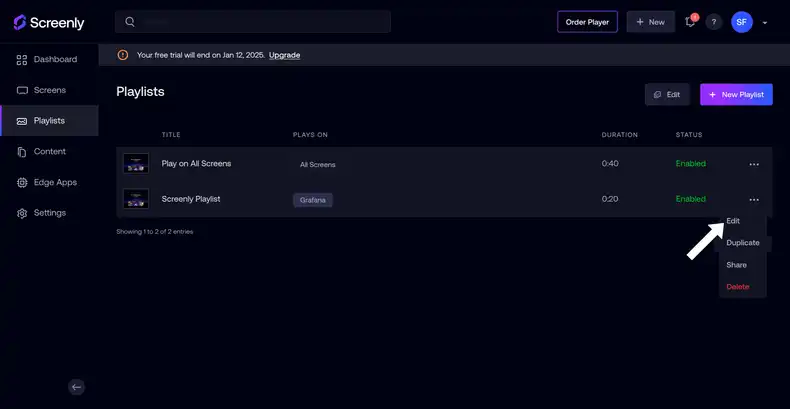
You can then assign the Google Calendar content to a playlist in your Screenly account. To do so, click the Playlists icon on the left-hand menu. Then click the three-dot button on the right side of an existing playlist and click the Edit button. Alternatively, you can create a new playlist by clicking the “+ New Playlist” button.
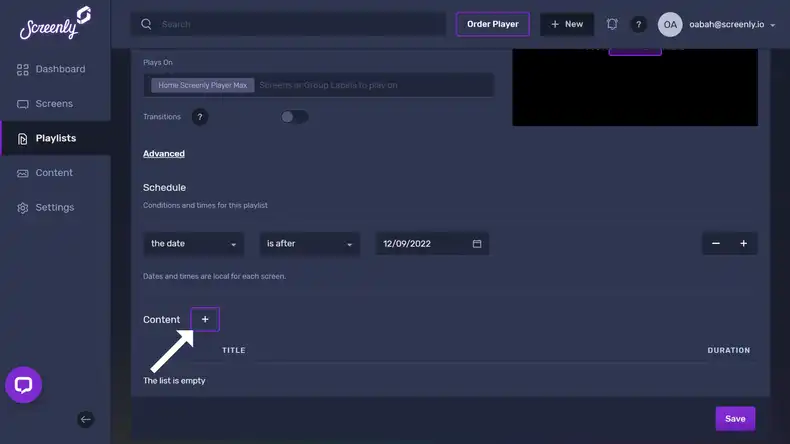
To add the Google Calendar content to the playlist, click the “+” button on the right side of the Content section within the Edit Playlist view. You can then select the Google Calendar content from your content item collection.
Once you assign the playlist containing the Google Calendar content to a screen, the Google Calendar will display on your TV or monitor in minutes.
You can select which screen(s) you want your playlist to show on by entering the screen name or screen group label in the Plays On section at the top of the Edit Playlist page.
Having followed these steps, you should now know how to get your digital Google Calendar showing on your digital sign with Screenly. If you need additional help, you can learn more about creating playlists with Screenly here, and learn more about adding screens with Screenly here. Also, feel free to reach out to Screenly Support anytime.
Get started with Screenly digital signage
If you do not already have a Screenly account, you can get started with a free trial. We offer a 14-day free trial, and you do not need a credit card to sign up.
