Set up SAML with Google Workspace and Screenly
Organizations can use Google Workspace and Screenly's SAML support for
by Pavel Safronov
Screenly offers SAML support with Google Workspace (formerly G Suite). For information about other supported identity providers, please see our SSO and SAML documentation.
SAML stands for "Security Assertion Markup Language" and allows users to transfer identity information between an identity provider (IdP) and a service provider (SP).
Step by step set up for Google Workspace SAML authentication
Step 1 — Sign in to your Google Workspace Admin Console at admin.google.com.
Step 2 — In the Admin Console, navigate to Apps > Web and mobile apps.
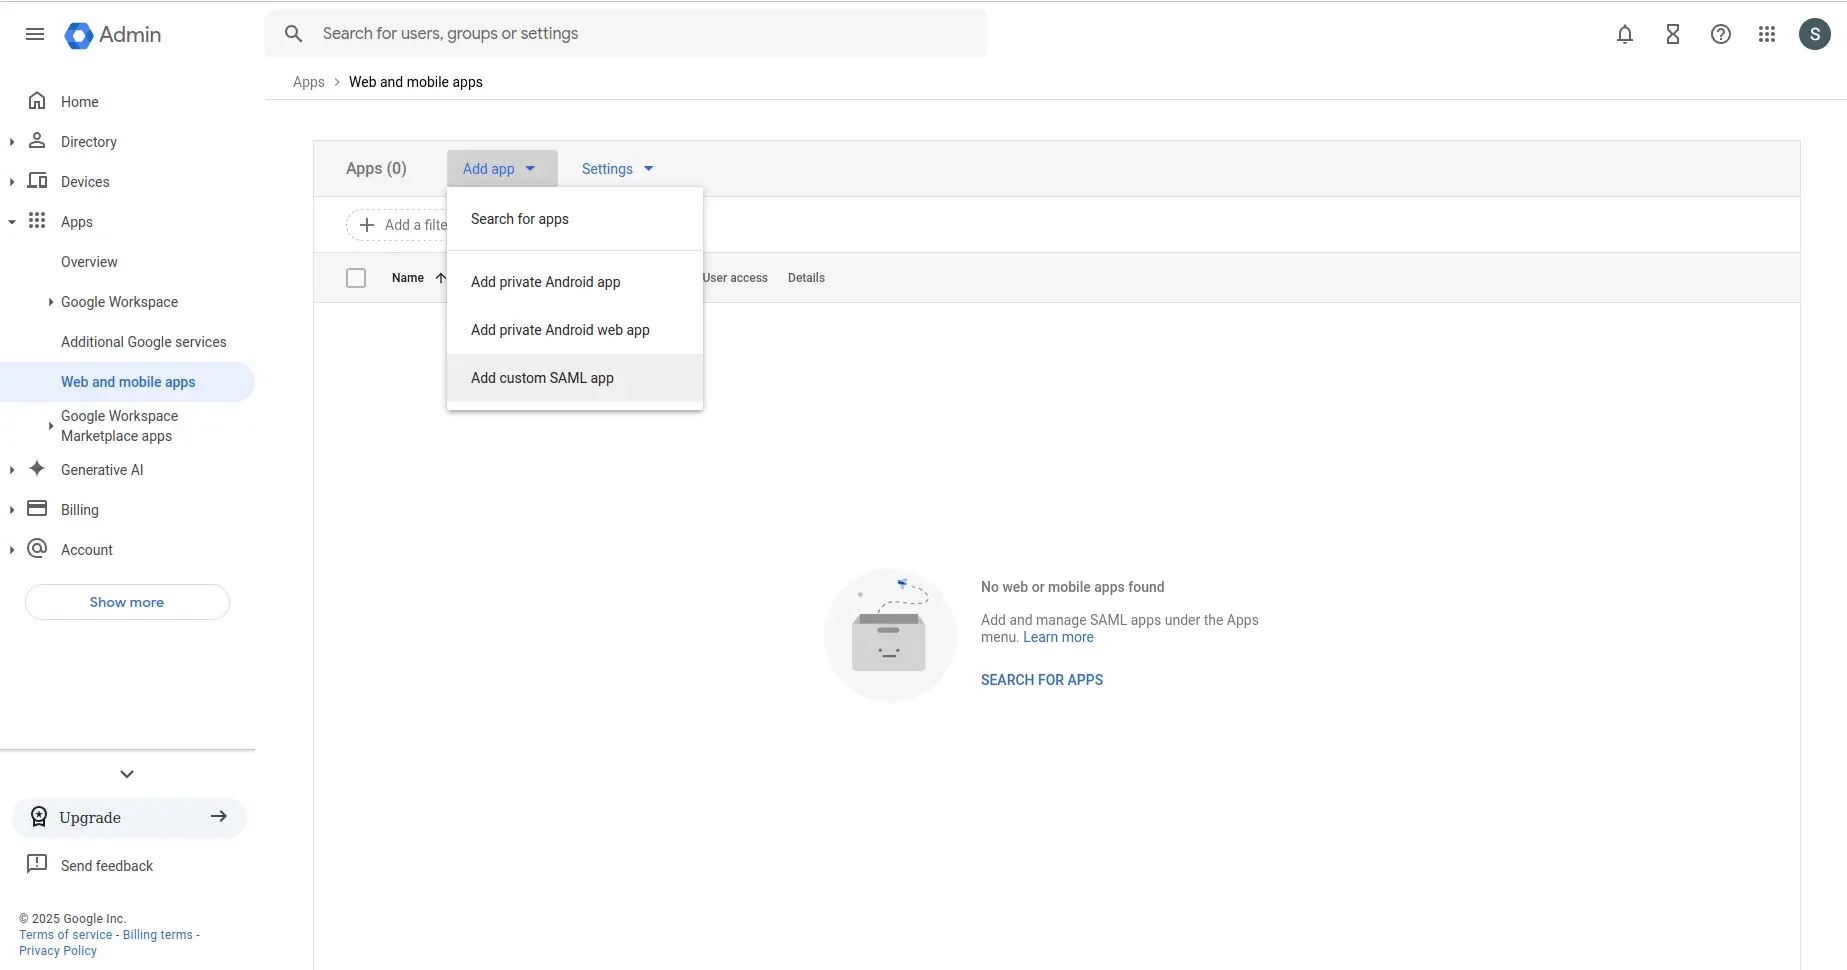
Step 3 — Click on Add App > Add custom SAML app.
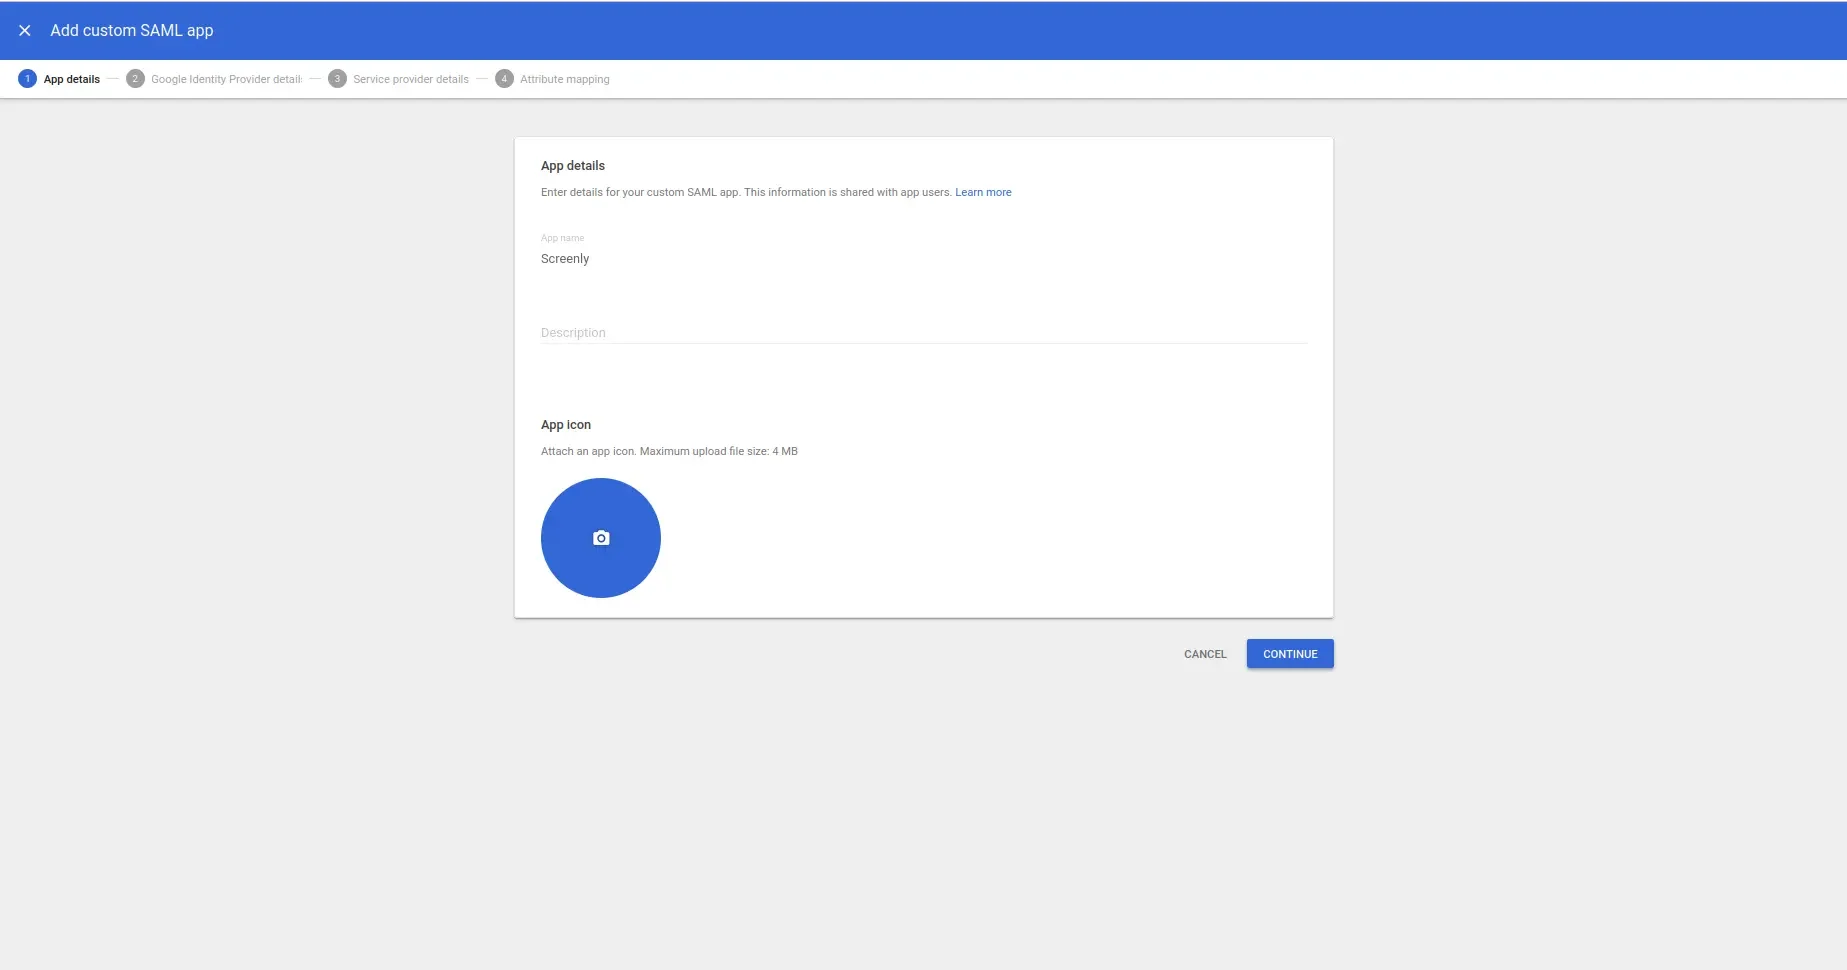
Step 4 — Enter a name for the application (e.g., "Screenly") and click Continue.
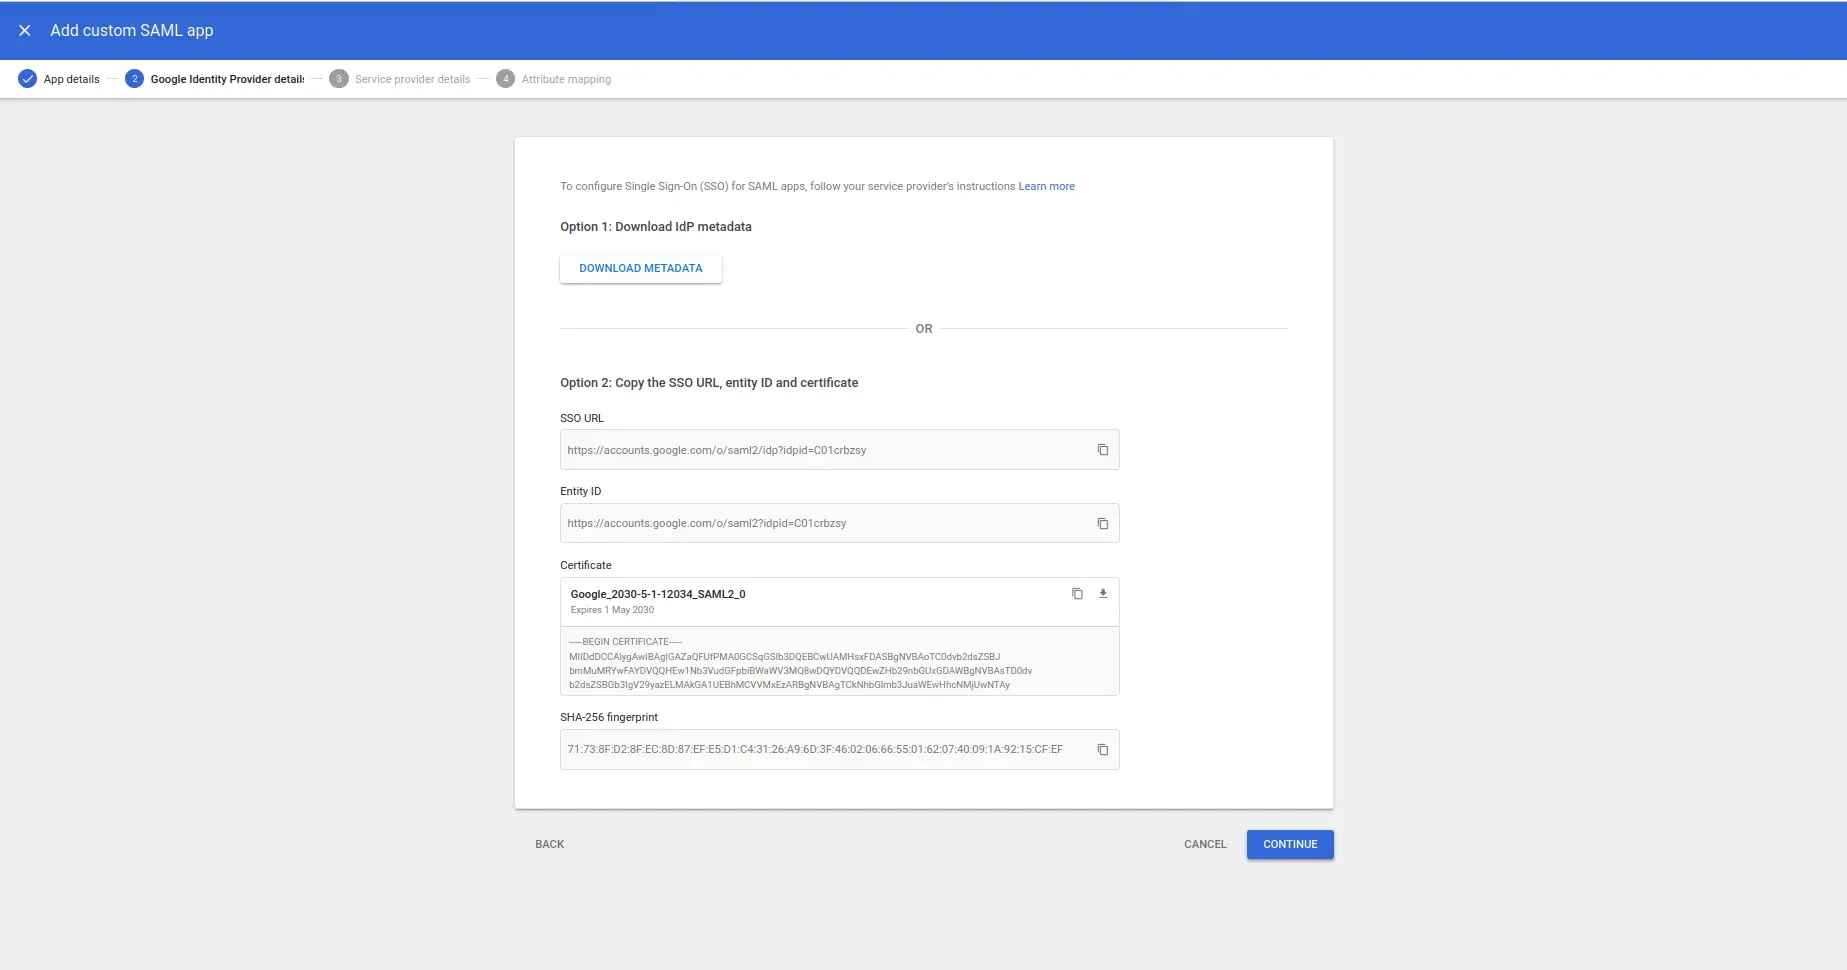
Step 5 — On the Google IdP Information screen, download the IdP metadata XML file.
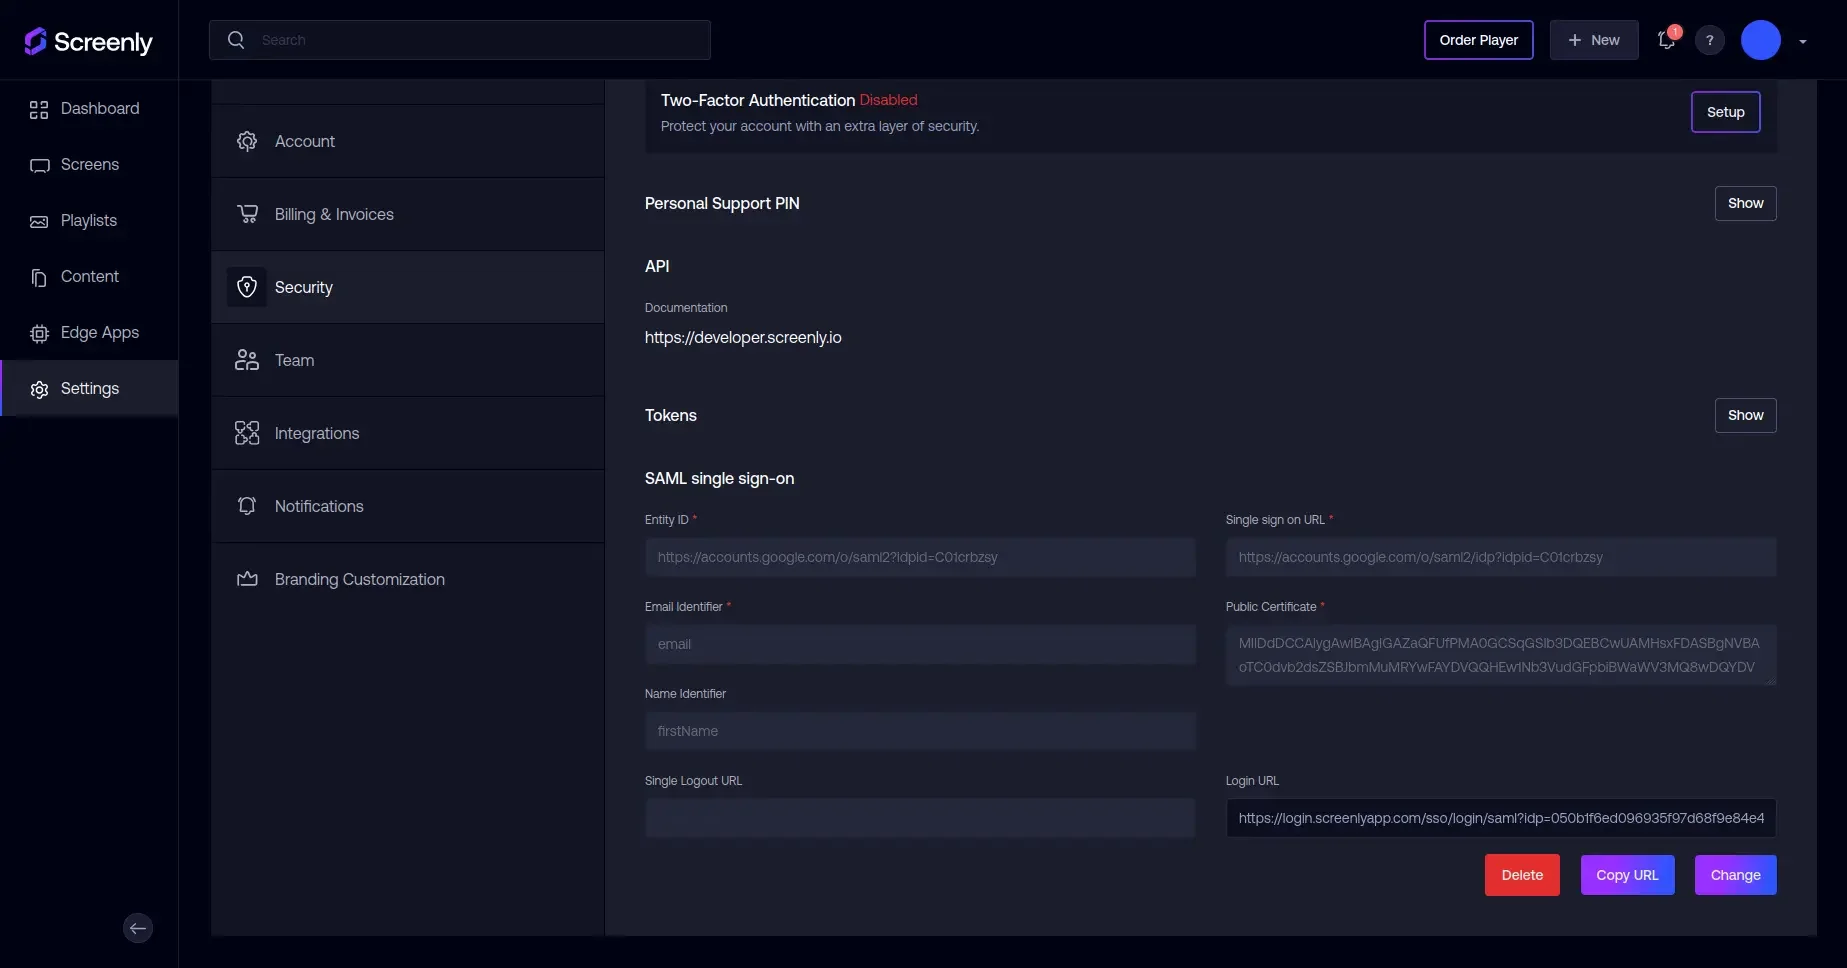
Step 6 — Configure Screenly SAML settings:
- Login to the Screenly webconsole
- Go to Settings > Security > SAML
- Click the "Import" button
- Select the downloaded metadata file to automatically populate the required fields
- Set Email Identifier to
email - Set Name Identifier to
firstName - Click "Save"
- Copy the generated Login URL (you'll need this for the next steps)
- Logout from Screenly
Step 7 — In the Service Provider Details section, enter the following information:
- ACS URL:
https://login.screenlyapp.com/sso/complete/saml/ - Entity ID:
login.screenlyapp.com - Start URL: Set to the
idpvalue from the copied Login URL (e.g., if the Login URL ishttps://login.screenlyapp.com/sso/login/saml?idp=abc123, useabc123) - Signed Response: Checked
- Name ID Format: EMAIL
- Name ID: Basic Information > Primary Email
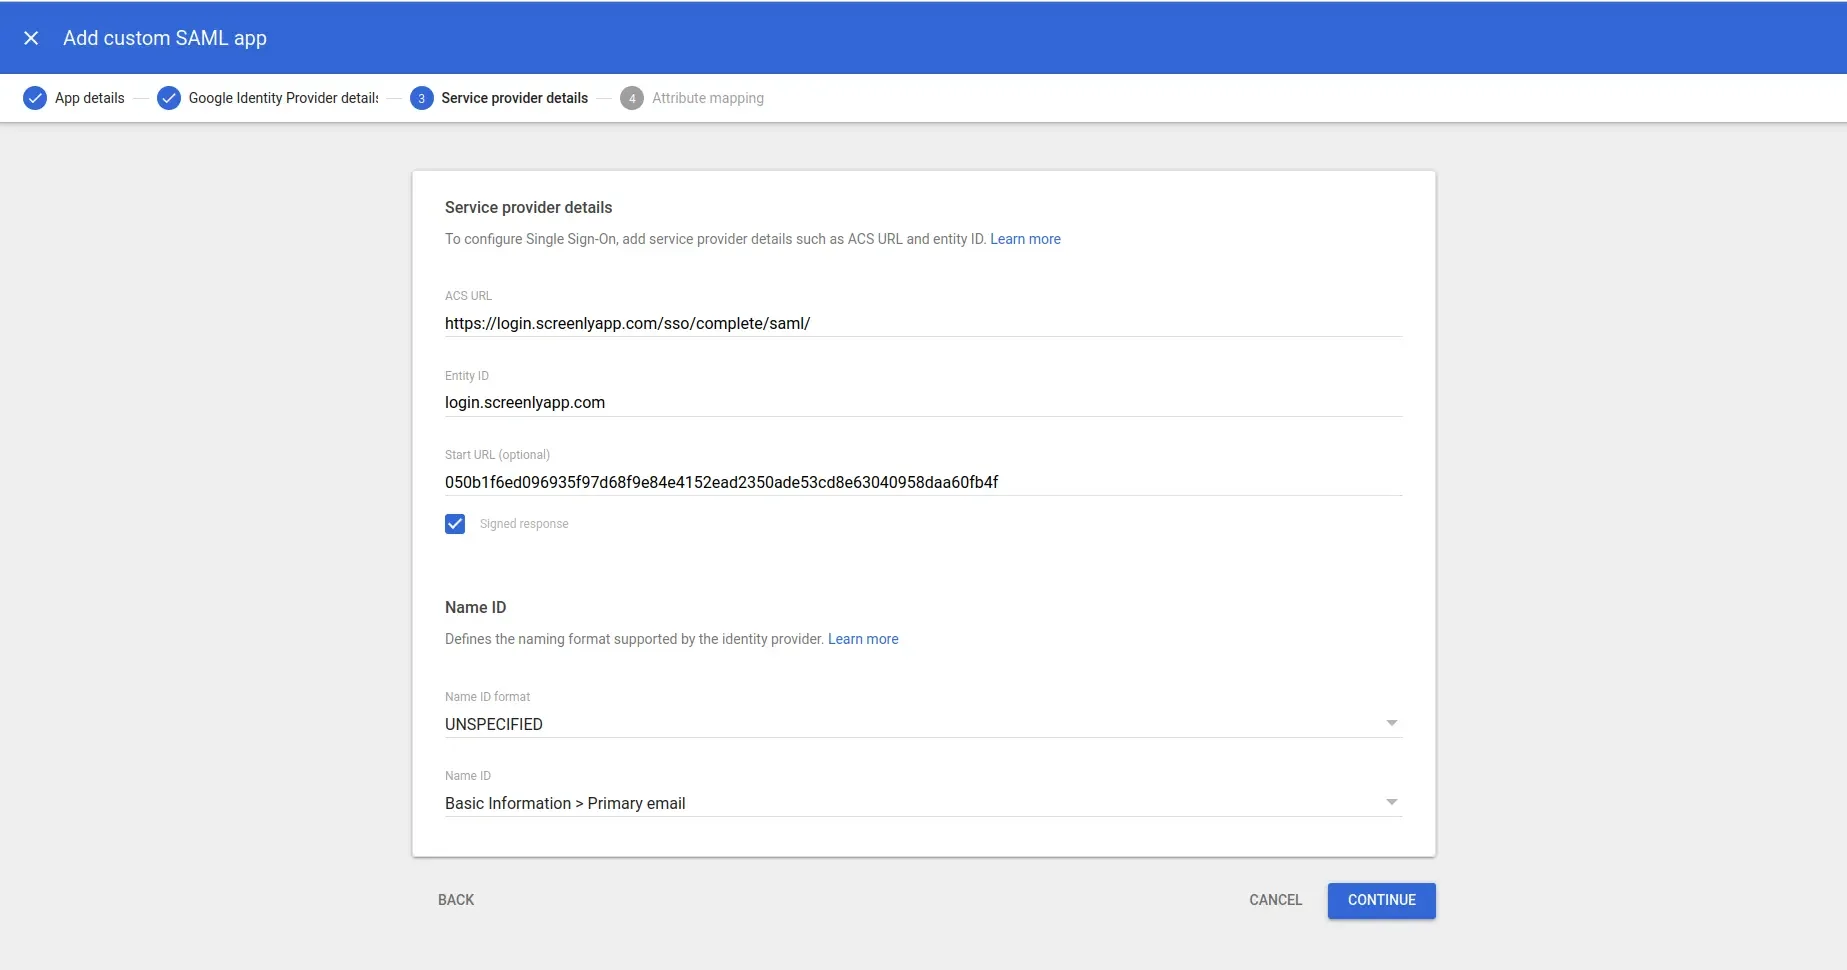
Step 8 — In the Attribute Mapping section, add the following mappings:
- Add
emailand map it toBasic Information > Primary Emailwith identifieremail - Add
nameand map it toBasic Information > First Namewith identifierfirstName - Click "Finish"
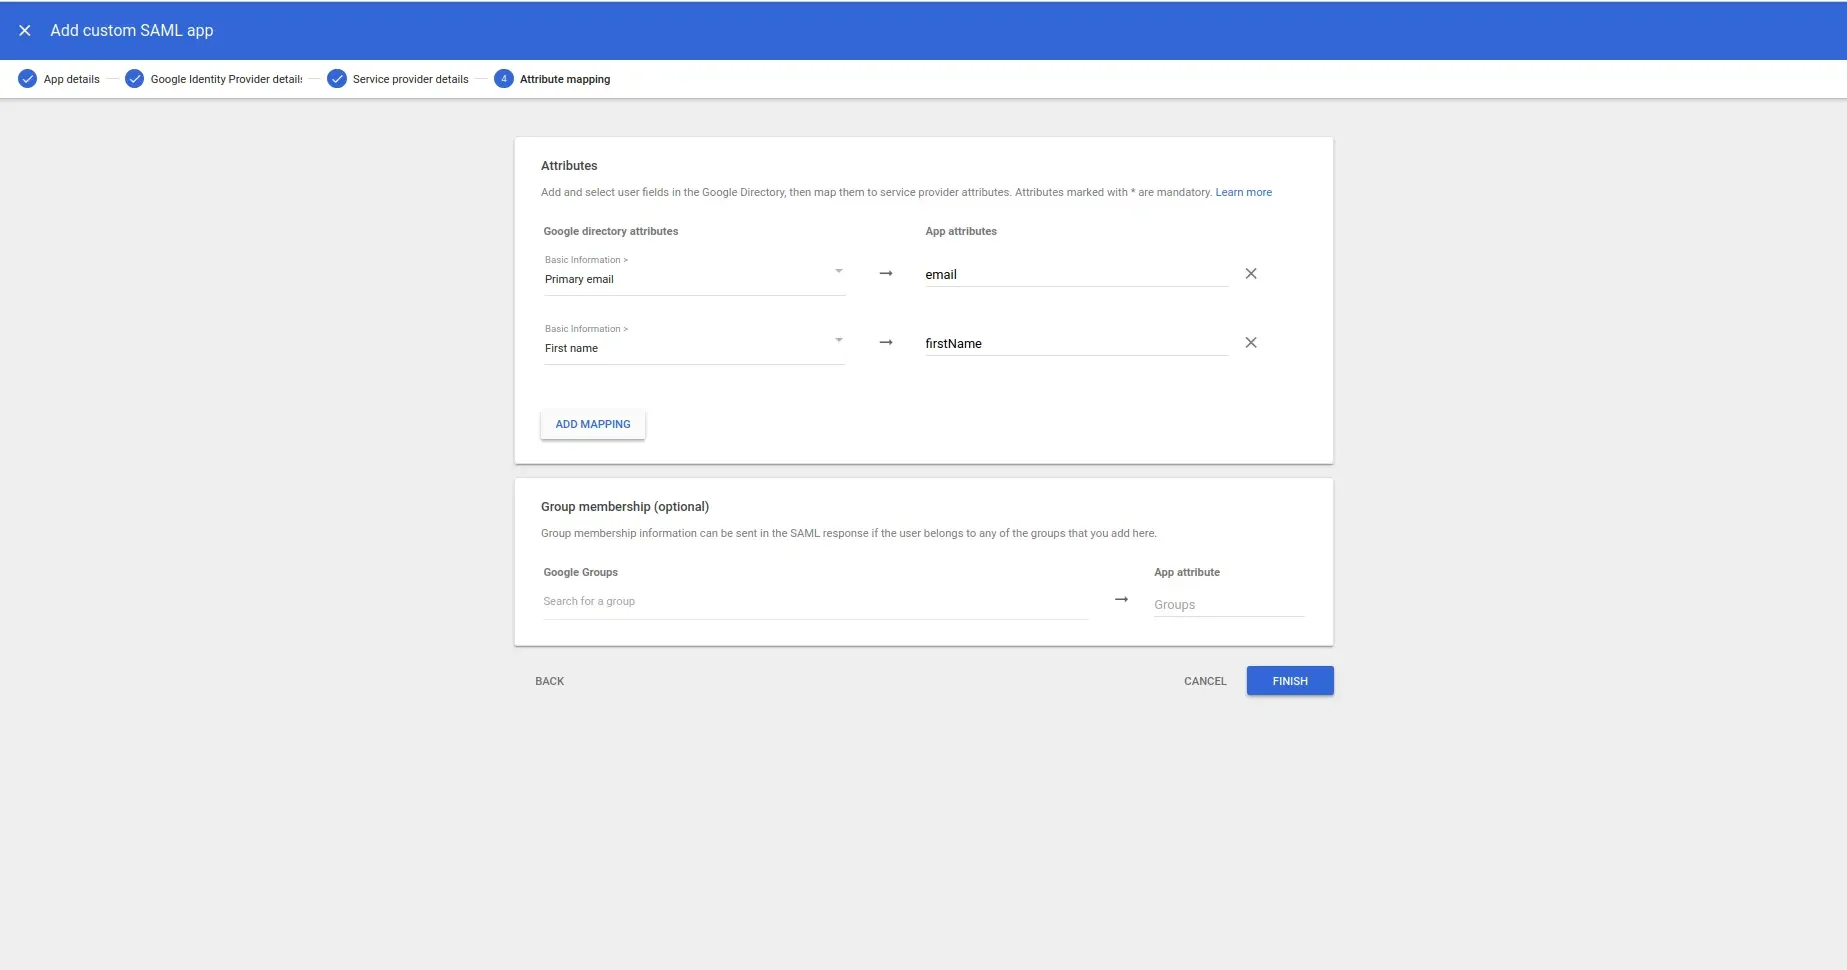
Step 9 — Configure user access:
- Select "ON for everyone" to enable access for all users, or
- Choose "ON" to specify which users can access the application
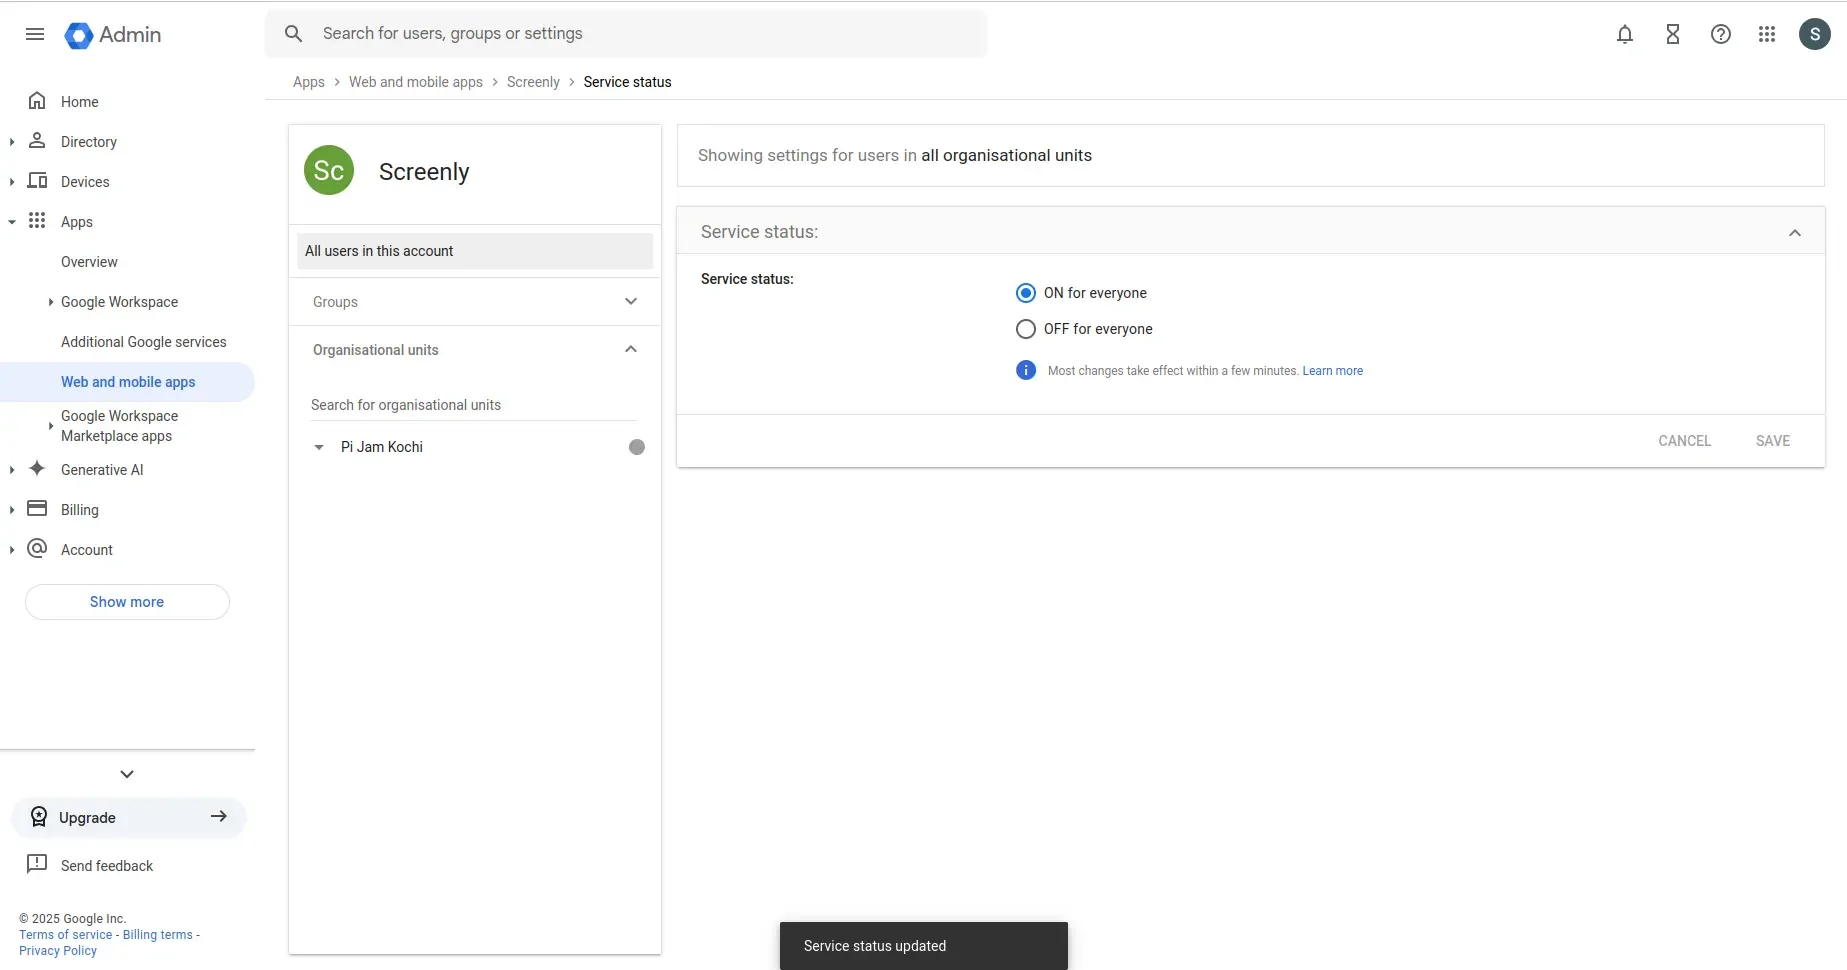
Step 10 — Test your SAML configuration by clicking "TEST SAML LOGIN". If you encounter any errors on your first attempt, please wait a few minutes and try again, as the configuration may take some time to propagate.
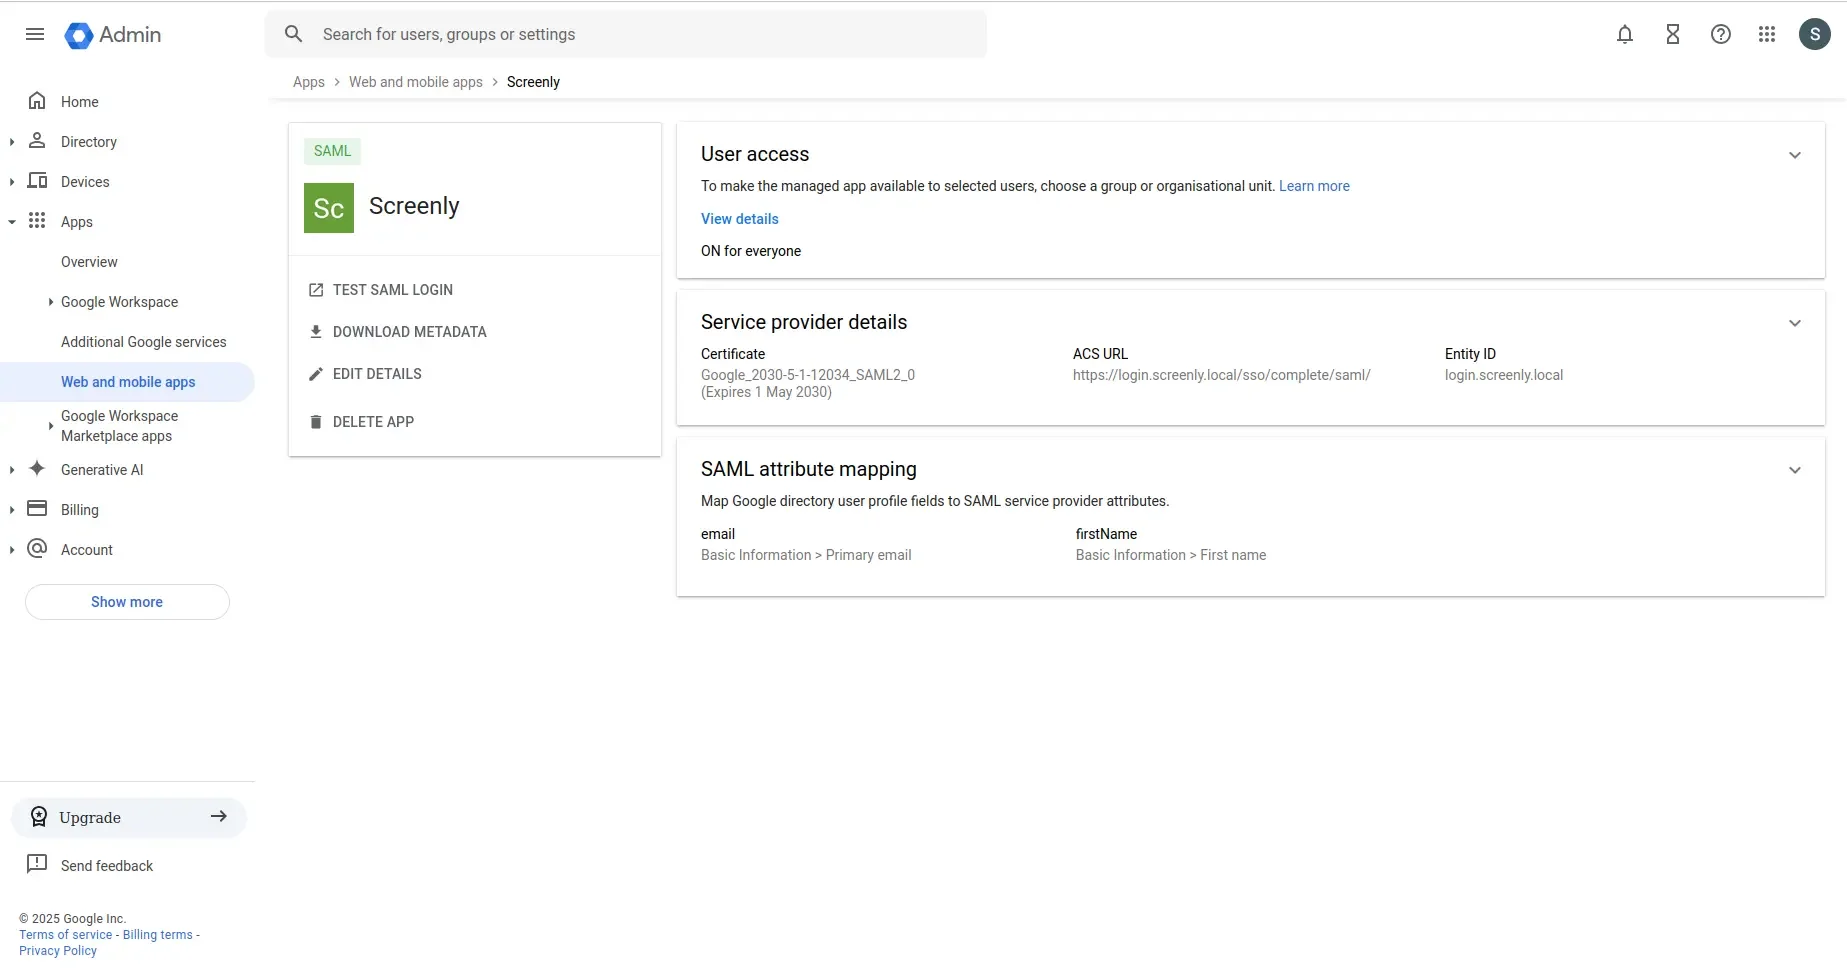
That's all! Your Google Workspace SAML integration with Screenly should now be complete.